

Motivation
Having being contacted by Facebook Developper circle: Buea to have a workshop online on building messenger bot, i am to prepare the workshop content and since its going to be virtual, i have decided to write an article on what i am suppose to do and share with the audience so this will be the central point where they can follow along with as a tutorial on that.
What is a messenger bot?
A bot is generally any software program that run a repetitive task. A messenger bot is actually a conversational bot that runs on Facebook Messenger.
In 2017 Facebook launched a messenger platform giving the ability to developers to build bots that could have a conversation with people on Messenger from a Facebook Page. With bots, businesses and apps can better engage with their users by providing personalized and interactive communication that can scale for the masses.
Developers can make users benefit myriad of services such as:
- getting immediate customer support
- booking a flight
- buying a ticket
- getting Netflix movie recommendations
- getting the weather forecast
- keeping up with the news
- getting advice on what to wear
- entertainment
- playing a game etc...
The current interest in and appeal of chatbots is obvious and as the technology in artificial intelligence improves, the bots will get better at interacting with users and we have a lot of ready to use the platform to make our bot intelligent such as Wit which is a natural language interface for applications.
what we will be building
We will build a simple messenger bot and host it on heroku. we’ll look at how to create a Facebook chatbot that can interact with users via Messenger on behalf of a Facebook Page.
Getting started
For our chatbot to communicate with Facebook users, we’ll need to set up a server that will receive, process, and send back messages. The server will make use of the Facebook Graph API for this. The Graph API is the primary way to get data in and out of Facebook’s platform. The server must have an endpoint URL that is accessible from Facebook’s servers, therefore deploying the web application on your local machine won’t work, we have to put it online or use tools such as ngrock . For this workshop,, we’ll deploy the app to Heroku as all default appname.herokuapp.com domains are already SSL-enabled. We’ll use Node.js to build the web application.
To get started, first make sure Node is installed on your computer. You can check this by typing
node -v
in the Terminal. If installed, it will output the version number. Then install the Heroku commande line interface . We’ll use this later to push the app to Heroku. Use heroku --version to verify that the CLI is installed.
Create the project directory and initialize the package.json
     $ mkdir mesengerBot
     $ cd messengerBot
     $ npm init
follow the prompts to set the preferences for the project. After open and add start property to the scripts object in order to lets Heroku knows what command to execute to start the app.
       {
  "name": "botworshop",
  "version": "1.0.0",
  "description": "a simple bot build for the messenger workshop",
  "main": "index.js",
  "scripts": {
    "test": "echo \"Error: no test specified\" && exit 1",
    "start": " node index.js"
  },
  "author": "Herve Dzeudjouo",
  "license": "ISC"
}
install the following node packages
$ npm install express request body-parser
Initialize a git repository and create a gitignore file and put node_modules inside to let git knows that the said folder should not be committed. In the project, root create a file called index.js and write the following code:
 const express = require('express')
const request = require('request')
const bodyParser = require('body-parser')

const app = express()
app.use(bodyParser.urlencoded( { extended: false}))
app.use(bodyParser.json())
app.listen((process.env.PORT || 3000))

// server index page
app.get(`/`, (req, res) => {
    res.send(`App deployed`)
})

// facebook webhook used for verification
app.get(`/webhook`, (req, res) => {
    if (req.query[`hub.verify_token`] === `this_is_our_token`) {
        console.log(`verified webhook`)
        res.status(200).send(req.query[`hub.challenge`])

    } else {
        console.error(`Verification failed. The token do not match`)
        res.sendStatus(403)

    }
})
The first GET is for our own testing and the second is the endpoint Facebook will use to verify the app. The app will look for the verify_token and respond with the challenge send
Deployment on Heroku
For the Facebook to connect with our backend we need to put it online.
create a git repo and commit files with the following command.
   $ git init
   $ git add .
   $ git commit -m "Initial commit"
Register for a free heroku account if you don't already have. From the terminal let's login and create an application.
 $ heroku login
$ heroku create
$ git push heroku master
$ heroku open
Running heroku open will open the app in the default browser and if everything goes well we will get a page with a text App deployed
Creating env variables on Heroku
Open Heroku dashboard and choose the app we just deployed Go to the app’s Settings and click on the Reveal Config Vars button. Enter VERIFICATION_TOKEN as the Key and our token as the Value and click Add.

In our code lest' modify ('this_is_our_token') to
process.env.VERIFICATION_TOKEN
commit changes and push to heroku
create Facebook page and app
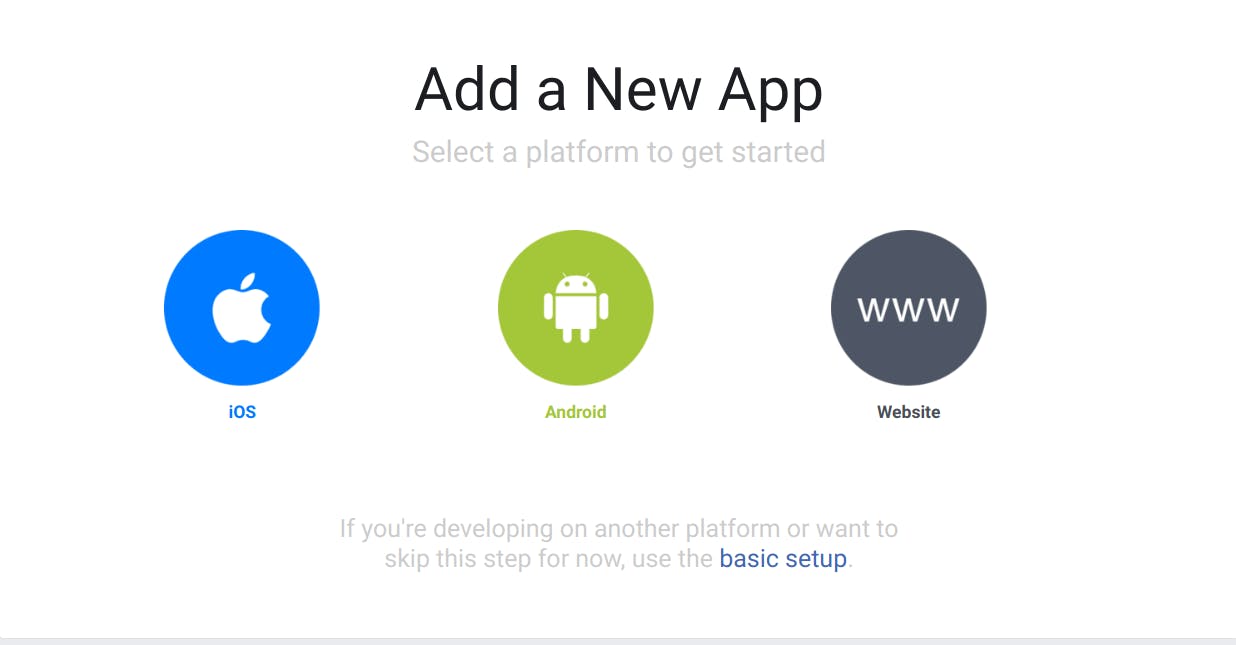
Head to facebook and create a page. To create a facebook app, head over to Add a new app and choose basic setup.
choose manage Business Integrations and fill the required informations and choose messenger integration and follow the instruction. To receive messages and other events sent by Messenger users, the app should enable webhooks integration. We’ll do this next. Webhooks (formerly Real Time Updates) let you subscribe to changes you want to track and receive updates in real time without having to call the API.
In the Webhooks section, click Setup Webhooks
Enter a callback URL where the updates will be sent (the endpoint URL defined in the backend app i.e. /webhook), enter a Verify Token (the token used in the backend app, i.e. the value stored in process.env.VERIFICATION_TOKEN) and check all the checkboxes. These specify which events the app will be subscribed to. In the Token Generation section, select your Page from the dropdown menu. After authentication, a Page Access Token will be generated for you.
Create another environment variable on Heroku and set its Key to PAGE_ACCESS_TOKEN and the generated token as the Value. Note that the generated token will not be saved in the current page it is shown in on Facebook. Each time you go to that web page, the Page Access Token field will be blank and when you select your Facebook Page from the Page dropdown menu, a new token will be generated. However, any previous tokens created will continue to function. So make sure you copy the token before closing the web page.
Welcome screen
When a user start a conversation with our bot, the first thing he will seis the welcome screen. This will show the page name etc... we can use this to set an introductory message that will let the user’s know what to expect from our bot. By default, to start a conversation it is the user that sends the first message to your bot. You can, however, enable a Get Started button that will enable your bot to send the initial message. The button will send an event to your server that you can then respond to. To do this heads up to the page setting select Messaging from the left panel and then turn on Show a Messenger Greeting on the right panel. Set the message to your liking. To enable the Get Started button, replace the PAGE_ACCESS_TOKEN string in the following statement with your token and paste the command in Terminal.
curl -X POST -H "Content-Type: application/json" -d '{
  "get_started": {"payload": "Greeting"}
}' "https://graph.facebook.com/v2.6/me/messenger_profile?access_token=<PAGE_ACCESS_TOKEN>"
// replace PAGE_ACCESS_TOKEN with what is on your setup
The above makes a request to the Facebook Graph API. If the request is successful, a Get Started button will appear on the Welcome Screen of a new conversation. A user clicking on the button will trigger the postback received callback. Your bot can then respond to this postback.
Postbacks can be triggered by different types of components – a Postback button, Get Started button, Persistent menu or Structured Message. You can set any string as the payload. On the backend, we’ll then use this string to identify the postback sent as a result of tapping the Get Started button. To receive postback messages, your app must be subscribed to postbacks on your webhook. We did this earlier by checking the messaging_postbacks checkbox when we were setting up the webhook. If the Get Started button is successfully set, you will get the following response.
{"result":"success"}
Remember the Welcome Screen and Get Started button only appear for new conversations. When coding and testing your bot, you can start a new conversation by deleting the current one.
To process the postback message, paste the following in your Node app.
 // all callbacks for messenger
app.post(`/webhook`, (req, res) => {
    // make sure that we have a page
    if (req.body.object == `page`) {
        //  iterate over each entry because there may be multiple if bached
        req.body.entry.forEach((entry) => {
            // iterate over each mesaging event
            entry.messaging.forEach((event) => {
                if (event.postback) {
                    processPostback(event)
                }
            })
        })
        res.sendStatus(200)

    }
})

function processPostback(event) {
    let senderId = event.sender.id;
    let payload = event.postback.payload;

    if (payload === "Greeting") {
      // Get user's first name from the User Profile API
      // and include it in the greeting
      request({
        url: "https://graph.facebook.com/v2.6/" + senderId,
        qs: {
          access_token: process.env.PAGE_ACCESS_TOKEN,
          fields: "first_name"
        },
        method: "GET"
      }, function(error, response, body) {
        let greeting = "";
        if (error) {
          console.log("Error getting user's name: " +  error);
        } else {
          let bodyObj = JSON.parse(body);
          name = bodyObj.first_name;
          greeting = "Hi " + name + ". ";
        }
        let message = greeting + "This is a test bot i am building for my bot development practice";
        sendMessage(senderId, {text: message});
      });
    }
  }

  // sends message to user
function sendMessage(recipientId, message) {
    request({
      url: "https://graph.facebook.com/v2.6/me/messages",
      qs: {access_token: process.env.PAGE_ACCESS_TOKEN},
      method: "POST",
      json: {
        recipient: {id: recipientId},
        message: message,
      }
    }, function(error, response, body) {
      if (error) {
        console.log("Error sending message: " + response.error);
      }
    });
  }
Whenever someone interacts with your bot or sends your page a message, an update will be sent via your Webhook integration. To get the messages, you have to listen for POST calls at your webhook. All callbacks will be made to this webhook.
In the POST handler above, we iterate over the messaging entries sent to the app. Sometimes messages are batched and sent together, so an entry may contain multiple objects. We then iterate through each entry’s messaging event and check for its type. The following shows the different callback messages that can be sent to the app.
- Message Received callback – The Message received callback is sent when a person sends your bot a message. You must have subscribed to the messages event when you setup your webhook.
- Postback Received callback – The Postback Received callback is sent when a person clicks on a button that has been configured to send you a postback. In order to get a callback from a postback, you have to have subscribed to the messaging_postbacks event when you setup your webhook.
- Message Delivered callback – This callback will occur when a message a page has sent has been delivered. You must have subscribed to the message_deliveries event when you setup your webhook.
- Authentication callback – This callback will occur when the Send-to-Messenger plugin has been tapped. You must have subscribed to the messaging_optins event when you setup your webhook.
- Message Read callback – This callback will occur when a message a page has sent has been read by the user. You must have subscribed to the message_reads event when you setup your webhook.
- Message Echo callback – This callback will occur when a message has been sent by your page. You may receive text messages or messages with attachments (image, video, audio, template or fallback). You must have subscribed to the message_echoes event when you setup your webhook.
- Checkout Update callback – This callback will occur when using the Buy Button with a flexible-amount transaction. This allows you to update pricing based on a person’s shipping address. You must have subscribed to the messaging_checkout_updates event when you setup your webhook. At the moment, this is not available outside the US.
- Payment callback – This callback will occur when a person taps the pay button from the checkout dialog rendered by the Buy Button. You must have subscribed to the messaging_payments event when you setup your webhook. At the moment, this is not available outside the US. If the event is a Postback, we call the processPostback() function where we check the payload value. Remember, we had set Greeting as the payload of the Get Started button, so here we first check if the messaging event was sent as a result of clicking that button. If so, we use the User Profile API to get the user’s first name and use this to personalize the message that will be sent back to them. From the API, you can get their first name, last name, profile picture, locale, timezone, and gender etc...